After the last day of deer season there is time for equipment maintenance and re-tooling for the following season. Nothing builds anticipation for the hunt more than crafting and customizing your own equipment.
There is little disagreement with the experts that the arrow is the most important component of an accurate bow shot. You can shoot a twig with twine and be accurate with a well matched straight arrow....but try to shoot a bent knarly, too weak, twig from the most expensive black widow recurve and you will be lucky to hit the backstop at 10 paces.
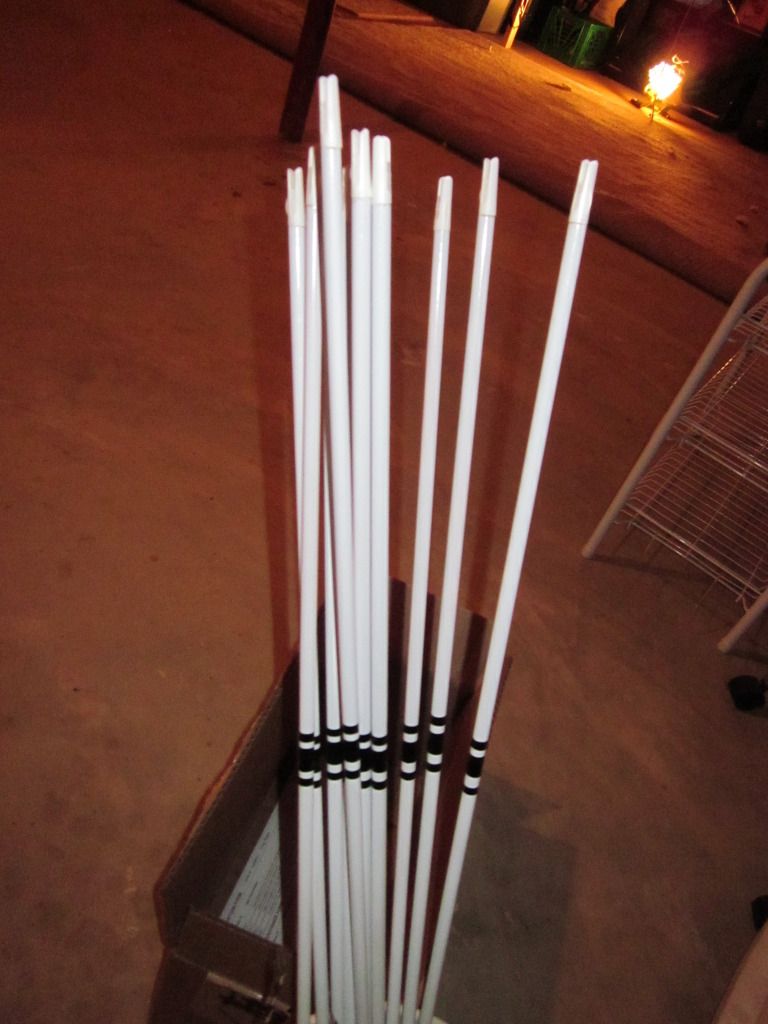
When I shoot my Straight end longbows it just seems wrong to shoot anything but wood out of them. Yes, carbon and aluminum are much straighter and more consistent, but it just seems wrong. Plus I can put more personal touches and do more myself with a wood shaft. I have made shafts out of red oak, maple, birch, and will someday use poplar I have drying, but when time is limited I like to buy raw wood shafts and start from there.
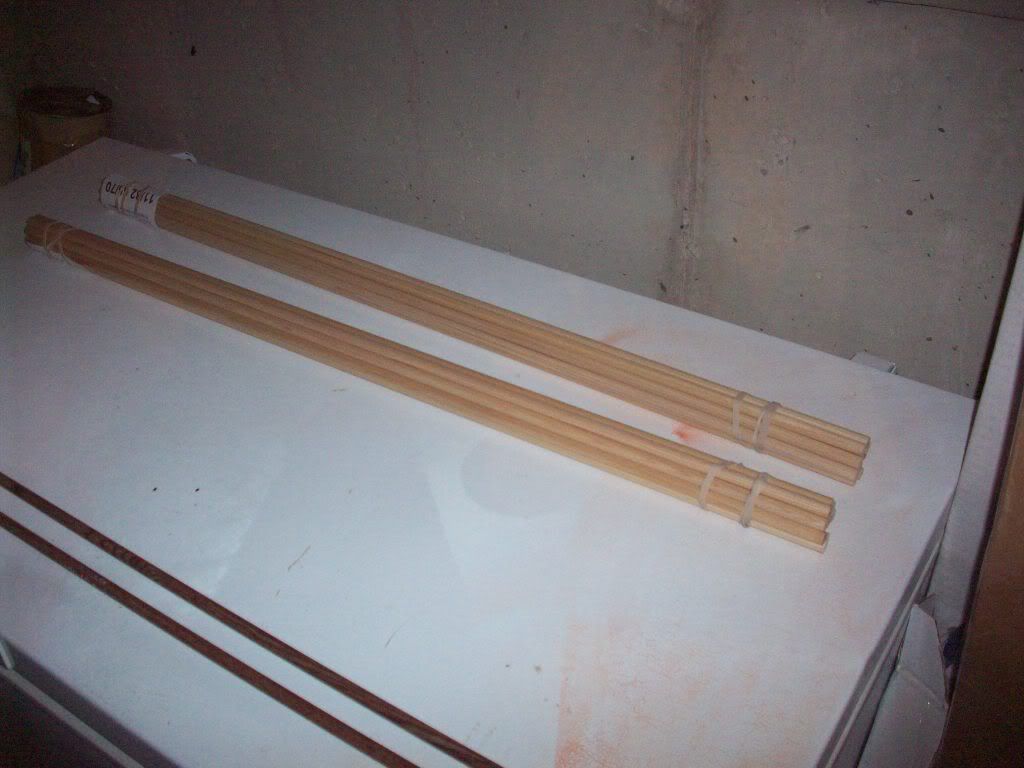
Port Orford Cedar has been a favorite for generations, but the existing old growth cedar has been depleted to the point that getting good, straight, wide growth rings is becoming near impossible. I have found that for my hunting purposes I like a little more durable and heavy shaft than POC. I hate straightening shafts. I found the perfect solution for me right now...Douglas Fir. These shafts are straight and from older growth wood. They are durable as all get out and need very little straightening and "maintenance". I prefer to get my shafts from the supplier to save some money. There is a small company called Surewood shafts (surewoodshafts.com) that knows their stuff and makes a quality product. In addition, their customer service is hard to beat. I highly, highly recommend them! I stick with the premium shafts because I hate to straighten and as I said, the arrow is all important.

I have recently found a love for tapered wood shafts. I learned that my old tapered carbon shafts were very spine tolerant and seemed to be easier to tune and fly better, so I thought I would give tapered woods a try. I decided to build my own inexpensive tapering jig by using some angle iron I found as scrap and some 1 inch wide sanding belts. Chuck the shaft up in a drill and viola! After a few minutes an nice taper from 11/32 to 5/16th at the nock end.

Next, I will sand the shafts with fine grit sandpaper to get rid of the sanding marks, then use 0000 steel wool till they are smooth. Then, I straighten them with a little help with the ace roller on a piece of glass until I am happy. Then they get a coat of minwax poly in clear gloss. This seals the shaft. Then, I steel wool it again a bit, and either paint, or put on more coats of poly if I am going "nude".
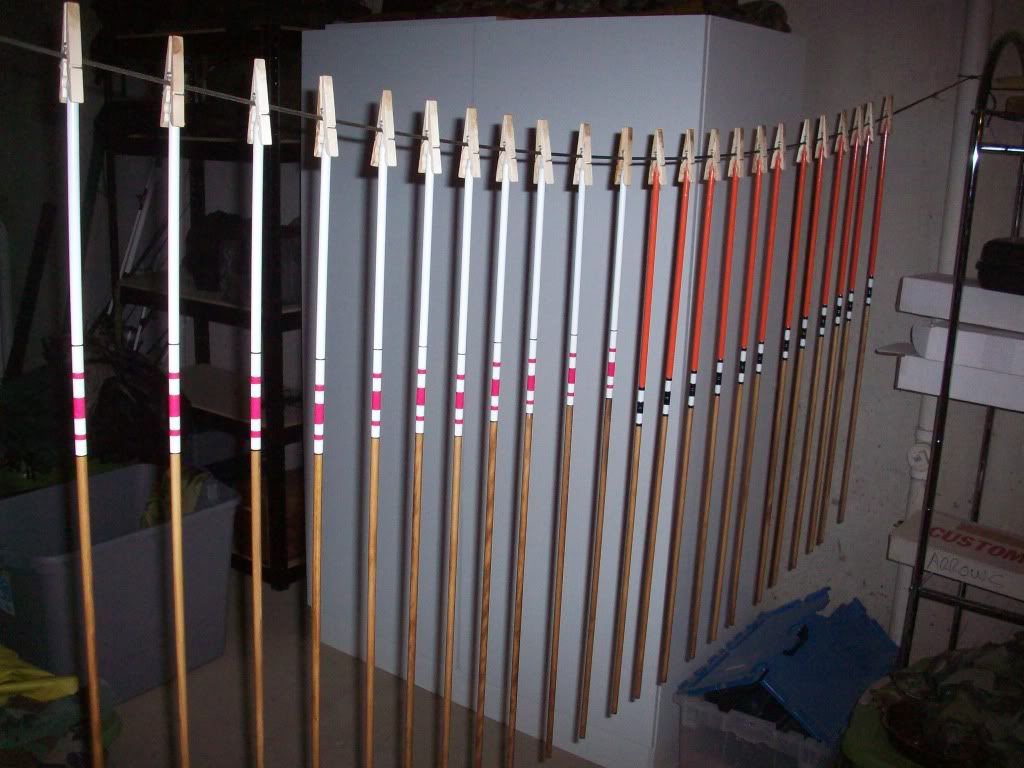
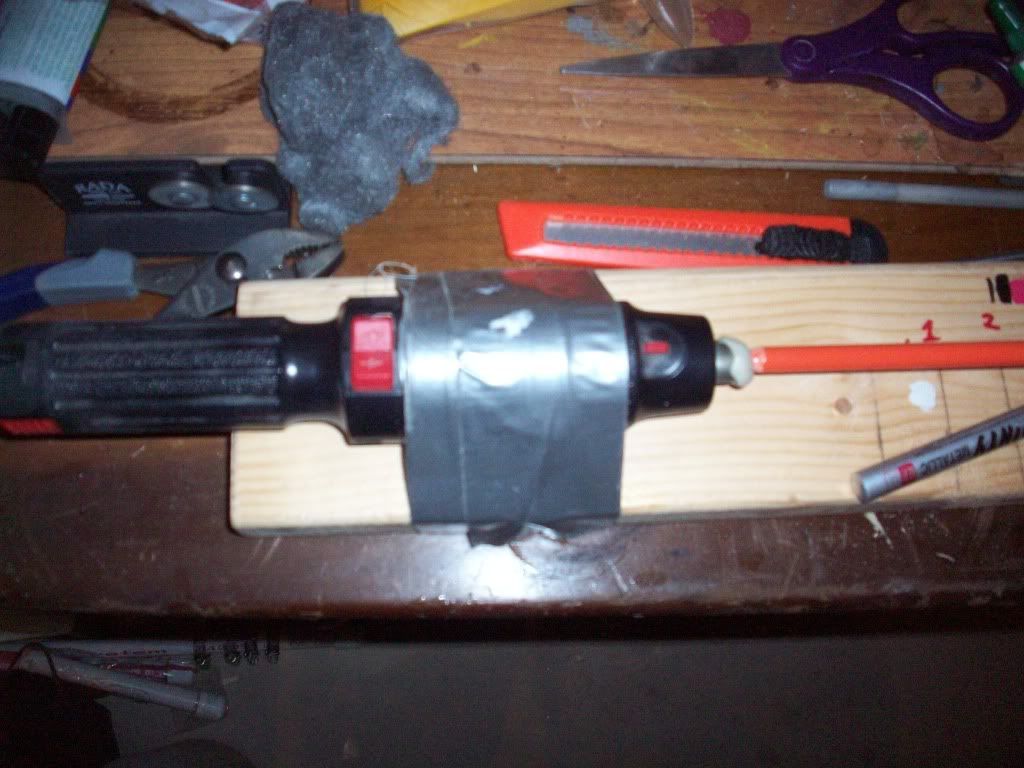
Usually, I will put on a cap of white krylon or rustoleum enamel followed by a second coat (after sanding) of the preferred color. The white really makes the color pop and you can tape off a nice spot for a crest on the white. I use a old cardboard box as a makeshift paint booth and do it outside or at the entrance to my garage using a N100 mask for protection. Here is my high tech crester (a cordless drill duct taped to a 2x4) and paint booth.
After all your fancy work is done and the nock is glued in (I prefer duco cement for this), it is time for fletching.
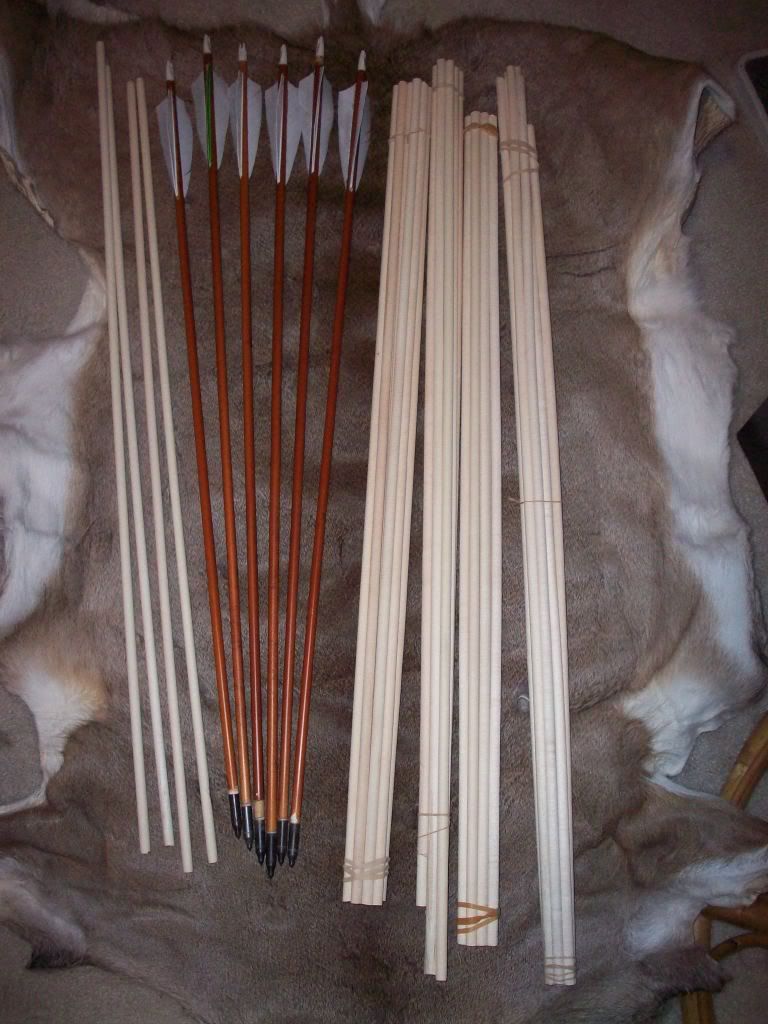
There is just something classy about natural barred turkey feathers! In my opinion they are also the most durable fletch you can use. Most commercial barred feathers are white and dyed to look barred. I think something in the genetics and processing of these domestic turkeys produce a feather that is not as stiff or durable as their wild counterparts. Nothing beats real turkey. Tell all your hunting friends to save you the wings from their successful hunts. If I had to rely on my turkey hunting success with the bow I would have zero feathers to work with. This will be my 7th year chasing them with traditional tackle and I have yet to launch an arrow at one.
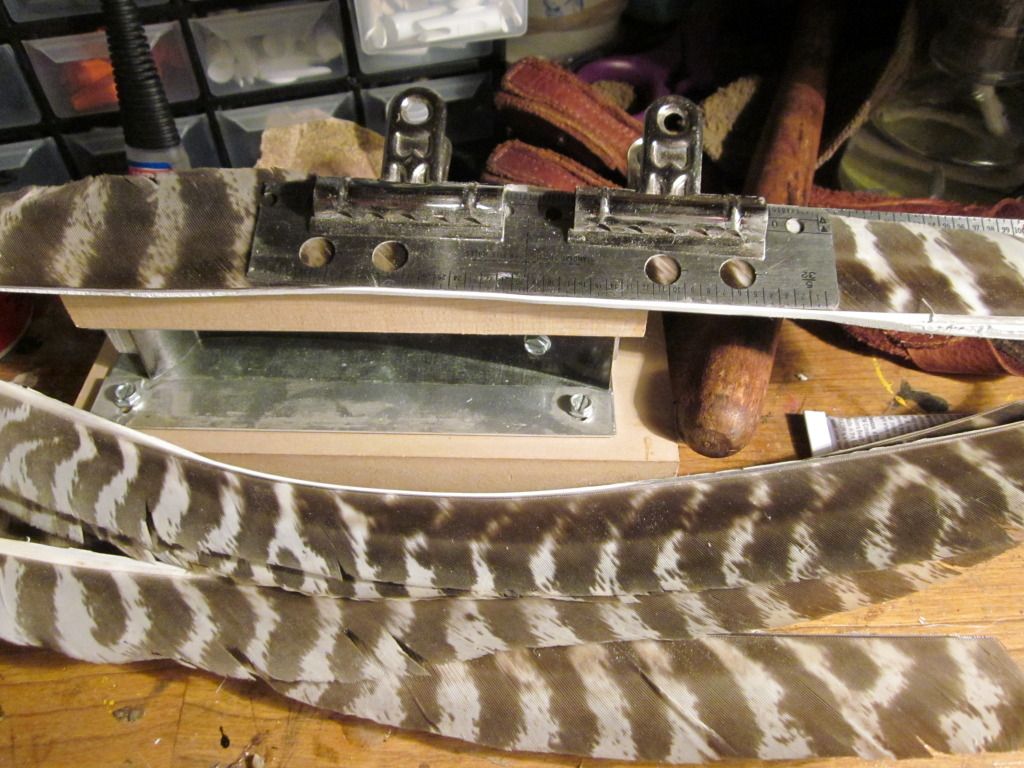
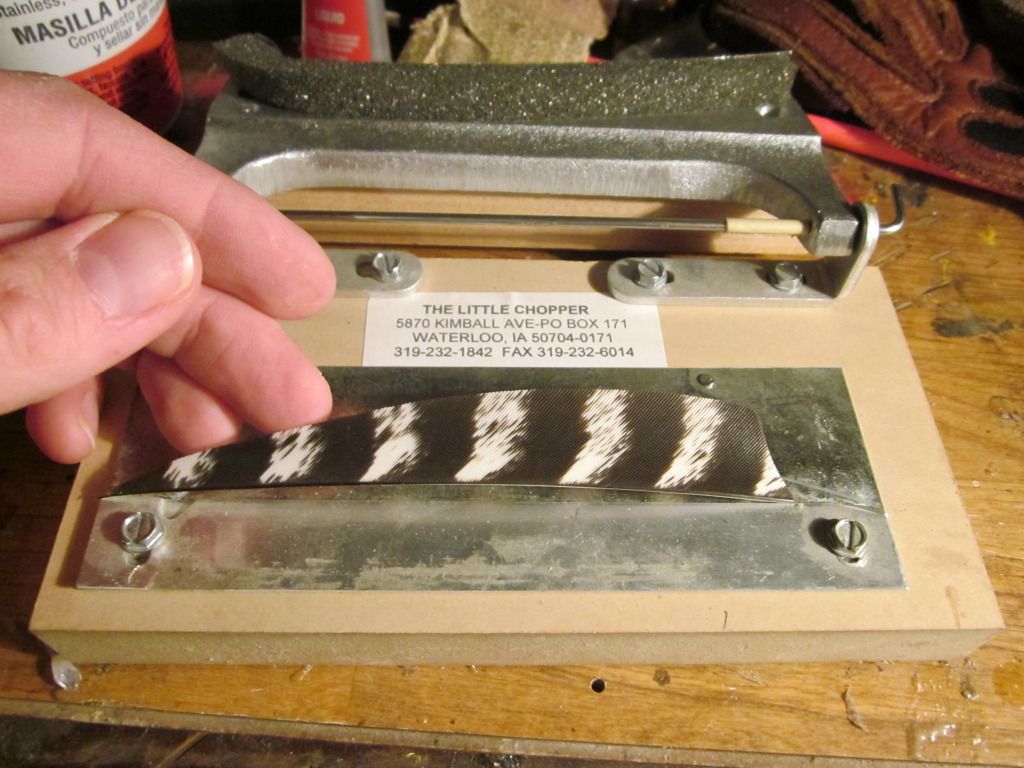
Once you have the feathers you can turn them into commercial looking feathers with the aid of a belt sander and a sanding jig (mine is made from an old broken metal ruler and some binder clips). A chopper or burner (I use a chopper) is used once the quill is ground down to the proper level. I use an inexpensive Jo-Jan jig and have settled on loctite superglue to affix the fletchings. I find this to be the most compatible with my sealers, it sets up nice and quick, and is really durable. I tried and tried fletch tape, but I do not find it to be as durable as good old fashioned glue.
This is a repair job on an older arrow:
You can get pretty fancy. Here is an all white shaft that reminds me of something Howard Hill would have had in his back quiver.
Have fun! Once you start building your own tackle you may find a whole new satisfaction to your hunting and shooting.

 Port Orford Cedar has been a favorite for generations, but the existing old growth cedar has been depleted to the point that getting good, straight, wide growth rings is becoming near impossible. I have found that for my hunting purposes I like a little more durable and heavy shaft than POC. I hate straightening shafts. I found the perfect solution for me right now...Douglas Fir. These shafts are straight and from older growth wood. They are durable as all get out and need very little straightening and "maintenance". I prefer to get my shafts from the supplier to save some money. There is a small company called Surewood shafts (surewoodshafts.com) that knows their stuff and makes a quality product. In addition, their customer service is hard to beat. I highly, highly recommend them! I stick with the premium shafts because I hate to straighten and as I said, the arrow is all important.
  Next, I will sand the shafts with fine grit sandpaper to get rid of the sanding marks, then use 0000 steel wool till they are smooth. Then, I straighten them with a little help with the ace roller on a piece of glass until I am happy. Then they get a coat of minwax poly in clear gloss. This seals the shaft. Then, I steel wool it again a bit, and either paint, or put on more coats of poly if I am going "nude".
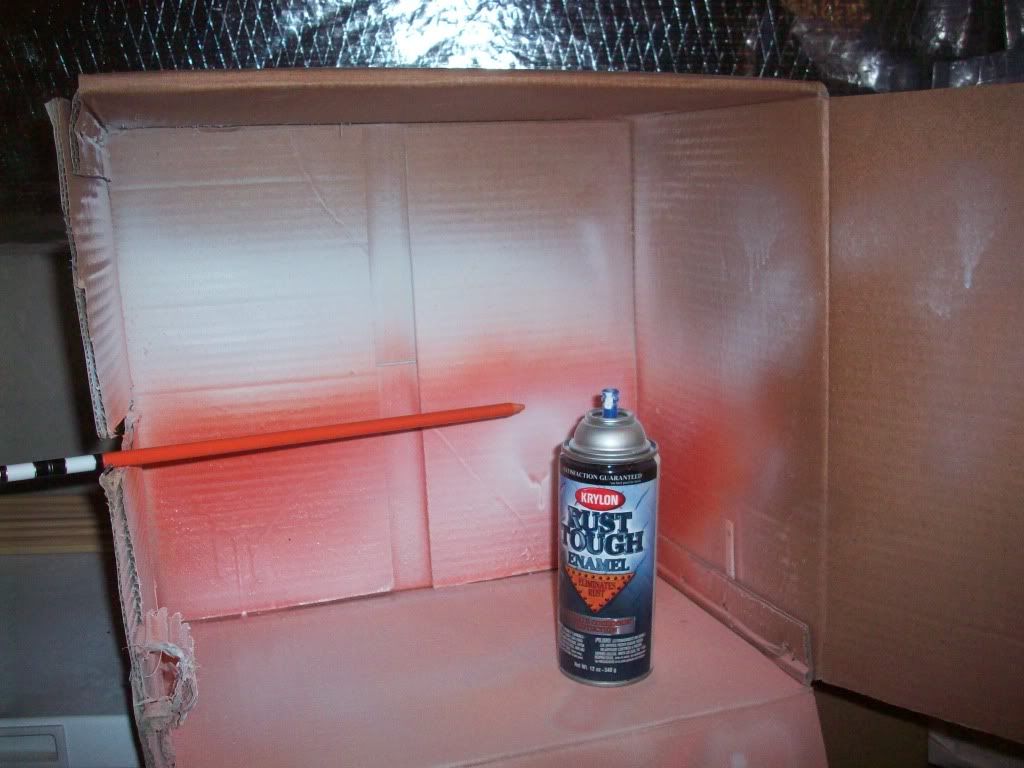
 Usually, I will put on a cap of white krylon or rustoleum enamel followed by a second coat (after sanding) of the preferred color. The white really makes the color pop and you can tape off a nice spot for a crest on the white. I use a old cardboard box as a makeshift paint booth and do it outside or at the entrance to my garage using a N100 mask for protection. Here is my high tech crester (a cordless drill duct taped to a 2x4) and paint booth.

 After all your fancy work is done and the nock is glued in (I prefer duco cement for this), it is time for fletching.
 There is just something classy about natural barred turkey feathers! In my opinion they are also the most durable fletch you can use. Most commercial barred feathers are white and dyed to look barred. I think something in the genetics and processing of these domestic turkeys produce a feather that is not as stiff or durable as their wild counterparts. Nothing beats real turkey. Tell all your hunting friends to save you the wings from their successful hunts. If I had to rely on my turkey hunting success with the bow I would have zero feathers to work with. This will be my 7th year chasing them with traditional tackle and I have yet to launch an arrow at one.
Once you have the feathers you can turn them into commercial looking feathers with the aid of a belt sander and a sanding jig (mine is made from an old broken metal ruler and some binder clips). A chopper or burner (I use a chopper) is used once the quill is ground down to the proper level. I use an inexpensive Jo-Jan jig and have settled on loctite superglue to affix the fletchings. I find this to be the most compatible with my sealers, it sets up nice and quick, and is really durable. I tried and tried fletch tape, but I do not find it to be as durable as good old fashioned glue.
There is just something classy about natural barred turkey feathers! In my opinion they are also the most durable fletch you can use. Most commercial barred feathers are white and dyed to look barred. I think something in the genetics and processing of these domestic turkeys produce a feather that is not as stiff or durable as their wild counterparts. Nothing beats real turkey. Tell all your hunting friends to save you the wings from their successful hunts. If I had to rely on my turkey hunting success with the bow I would have zero feathers to work with. This will be my 7th year chasing them with traditional tackle and I have yet to launch an arrow at one.
Once you have the feathers you can turn them into commercial looking feathers with the aid of a belt sander and a sanding jig (mine is made from an old broken metal ruler and some binder clips). A chopper or burner (I use a chopper) is used once the quill is ground down to the proper level. I use an inexpensive Jo-Jan jig and have settled on loctite superglue to affix the fletchings. I find this to be the most compatible with my sealers, it sets up nice and quick, and is really durable. I tried and tried fletch tape, but I do not find it to be as durable as good old fashioned glue.

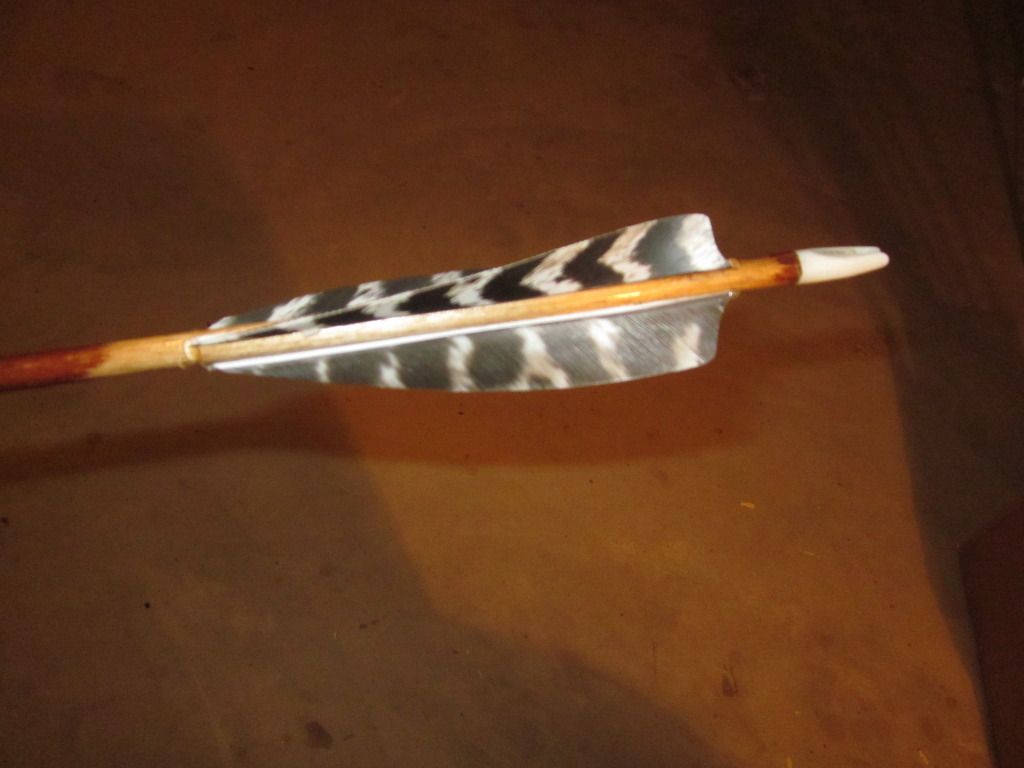
 This is a repair job on an older arrow:
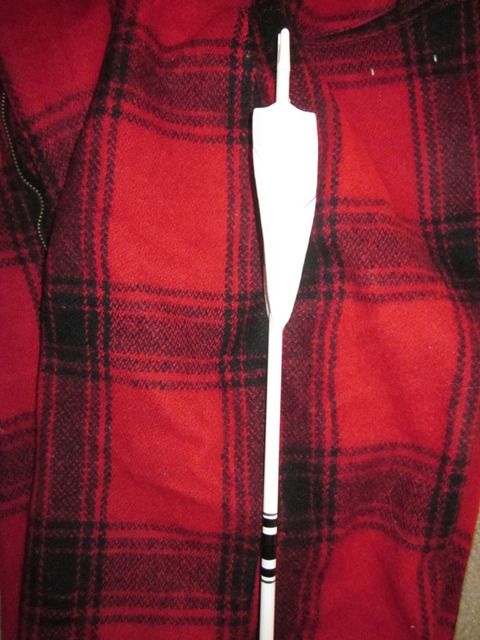
 You can get pretty fancy. Here is an all white shaft that reminds me of something Howard Hill would have had in his back quiver.
 Have fun! Once you start building your own tackle you may find a whole new satisfaction to your hunting and shooting.
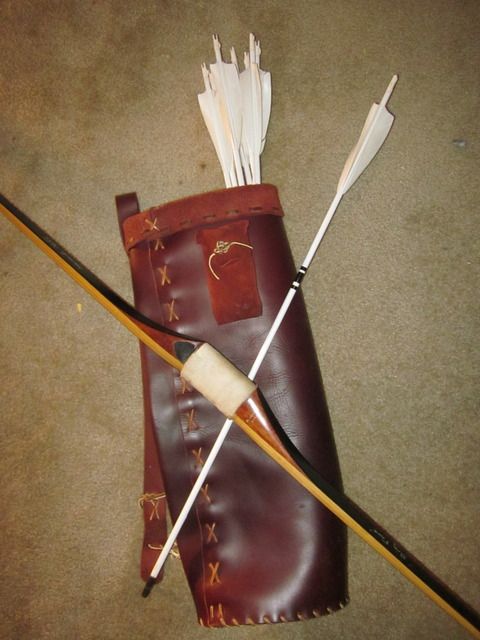
