Search This Blog

Tuesday, May 10, 2022

L.C. Smith - Hunting the Family Shotguns (Pheasants)


Hunting the Family Shotguns (originally published in the The Journal of the L.C. Smith Collectors Association - Volume 20, Issue 1, Spring 2022).


I am fortunate to have inherited two old L.C. Smith shotguns from my father.  The earliest gun belonged to my great grandfather Dr. David Marshall Ragan who was born in Conowingo, Maryland in 1866.  Doc Ragan began his practice in the horse and buggy days and served the good people of Cecil county, Maryland as a traveling country doctor.  He treated ill patients and delivered babies in their homes, sometimes receiving livestock as payment as referenced in his written receipts.  Eventually, he opened a pharmacy with his brother William and stayed in practice until the completion of the Conowingo Dam which forced him to abandon the building to the reservoir waters.   My father told me he was an avid bird hunter, and having the means, purchased a modest No. 2 Grade 16 gauge L.C. Smith SN 61359 that I now own.  The double has 28-inch barrels, shell extractors, two triggers, and a splinter forend that was finished on October 9, 1903.  It has engravings of a “woodcock in a circle” on the right side and a “Quail in a circle” on the left.  It has seen much use and handling but is still in fine shape for the age.


Combination Post office and Pharmacy.


Doc Marshall's doctor bag


Serial number 61359, 28-inch barrels, shell extractors, two triggers, splinter forend, Finished October 9, 1903. 1 of 191 built to those specifications. 


The second shotgun belonged to one of the doctor’s 6 sons, and my grandfather W. Curtis Ragan.  Curtis was a simple farmer who lived in the same town.  Having to scrape a living during the great depression my father told me he was often tasked with hunting as a means to bring home needed food for the family.  My grandfather liked to hunt squirrel and waterfowl.  His shotgun was the least expensive popular 12-gauge Field Grade SN 181176 with 30-inch barrels, two triggers and a splinter forend. It was built on November 28, 1935 on a regular-weight frame with automatic ejectors.   

 The Smith Won Grandfather's Pattern Test

The story is my grandfather set up a pattern test between his LC Smith and the Ithica featherweight pump he used mostly for duck hunting.  The Smith with the full choke barrel outperformed the Ithica and became his favored squirrel gun.  It is in excellent shape with only the bluing worn on the sides of each tube from carrying.


Serial Number 181176, Regular-weight frame, 30-inch barrels, two triggers, automatic ejectors, splinter forend, Finished April 28, 1939, 1 of 1,998 in that configuration.

A good friend of mine named Bill offered for me to join him on a pheasant hunt at a game club he was a member of in Gettysburg, Pennsylvania in early November 2020.  I quickly took him up on the offer and started thinking about using one of my vintage LC Smith shotguns on the hunt.  I decided I would use the later Field Grade shotgun of my grandfather as I had a couple boxes of vintage paper Remington “Kleanbore” number 6 shot shells that came with the gun.  That gun was also very tight and appeared to be in great shape.  I admit I struggled to hit the first couple birds, but I managed to kill a cock and a hen with it. 


When Bill asked again if I would join him on a hunt that year, I opted for my father’s more modern Italian over under 12 gauge instead, and I found it much easier to point than the long-barreled Field Grade.  As I was reflecting on the successful hunts with both my father and grandfather’s shotguns, I now had a desire to also use Doc Marshall’s 16 gauge and complete the use of the three generations of family shotguns.  I knew however that the 16 gauge needed a little more gentleness and was also chambered in 2 ½ inch instead of 2 ¾.   The stock was in great shape and I wanted to keep it that way. The pandemic was in full force by this point and ammo was now much harder to find.  Eventually, I was able to order some cardboard RTS number 7 shot in 2 ½ inch and was in business. 


As we signed in at the club house on that chilly morning in November 2021, I was brimming with excitement and a bit anxious about hunting with a gun that was 118 years old.  As we started out, I noticed immediately that the gun was a joy to carry.  Light weight compared to the 12-gauge Field Grade it pointed like a dream with the shorter 28-inch barrels.   As the dogs took to the sorghum field edges, I didn’t have long to wait for Bill’s Pudel pointer “Boomer” to have a bird on point.  Bill and I got up on that bird and it flushed beautifully rising against the smokey sky.  I was automatically on target and swinging with the bird from right to left.  Squeezing the front trigger, the bird instantly folded in a puff of feathers and Bill gave out a hearty “HEY YEAH” as Boomer went to work retrieving.   I had a huge smile and within an hour and a half, Bill and I both had our three-bird limit.  The elegant and trim little 16-gauge from bygone days handled like a dream and provided a day that will be a cherished memory. 


I’ll definitely be toting the old No. 2 Grade again if I go on future pheasant or dove hunts.  I’m thinking that the 30 inch 12-gauge Smith just might be the ticket for a spring gobbler hunt.  I had now accomplished successful hunts with 3 generations of the Ragan family shotguns.  The old girls can certainly still “get it done”.  I can’t help reflecting that one day when I am gone my son Garrett, who is now eight-year-old, may want to repeat the feat with the addition of my “vintage” Remington 870 12-gauge pump.  What better way to preserve a bit of history and remember our passed family members doing what they loved?


The author with Bill and Boomer at the end of a successful morning.


Friday, March 4, 2022

Sourdough English Muffins


Almost every morning I wake up for work I make myself a egg and cheese muffin for breakfast.  I used to buy a lot of Thomas' brand from the grocery store especially since the bakery is right in town where I live.  I found some great satisfaction in making these muffins myself at home and it is surprisingly easy. Since I have been sourdough obsessed, I already had the starter ready and fed.  I make a batch typically on the weekend and freeze what I will not use during the week.  The added benefit from making them myself is simple ingredients (really just flour, water, milk, salt, and sugar or honey) and no preservatives, additives, or soy.

To learn about making the starter check out my Sourdough Starter Post.

This is my recipe for making English muffins. 

Ingredients;

1 cup fed sourdough starter

4 cups all purpose flour

1/4 cup powdered milk (or regular milk just reducing water)

About 3/4 - 1 cup water

tablespoon or honey or sugar

1 teaspoon salt

some yellow cornmeal for sprinkling


In a large mixing bowl add 1 cup of sourdough starter.  Then I like to use 1/4 cup of dry powdered milk, but you could also use 1 cup of regular milk and reduce the added water. 


Next, add about a tablespoon of honey (or granulated sugar), 4 cups of all purpose flour, and about 3/4 cup of warm water.  


Mix with a sturdy wooden spoon until the mixture start to become tacky, then wet your hands well and turn it onto a floured surface and knead the dough until it is smooth and just slightly tacky adding more water if necessary.


Now there is just some time to wait.  Place the dough ball into a bowl and cover with a damp tea towel or I like to use my corningware dish that has a plastic lid to seal. 


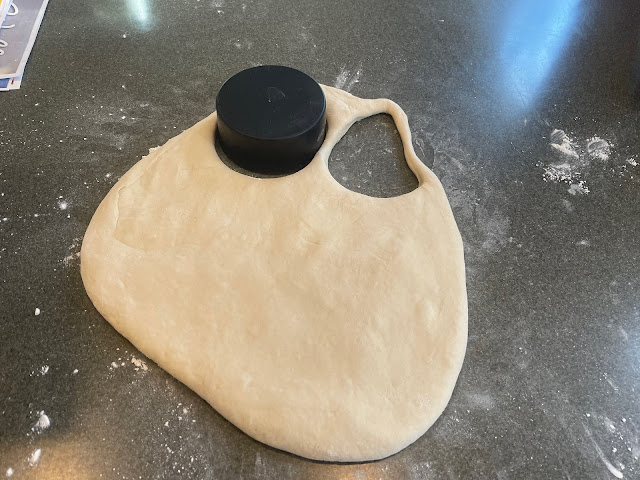
 After 8 -10 hours (or shorter if it is warm in the kitchen) turn the dough out onto a floured surface andpress it out using your hands or a floured rolling pin until it is about 1" in thickness   Using a 3" biscuit cutter, cut rounds and place them on a parchment lined baking sheet that's been sprinkled with cornmeal.  


 Sprinkle the tops with cornmeal, cover with a tea towel and allow to rise for 1 hour at room temperature. 

 
 Preheat your lidded iron skillet over LOW heat and let it fully heat up the lid and pan. No oil is needed, sprinkle corn meal over the pan and place muffins into the skillet spaced 2" apart, cover and cook the first side for about 4 minutes.  

 
Sprinkle additional corn meal over the tops and turn the muffins over and cook for an additional 4 minutes with the lid on. It helps to press down with a spatula lightly to eliminate the dome and get an even brown. 

 
 When done, the center of a muffin should register about 200°F on an instant-read thermometer.  Cool on a wire rack and your done. You can then freeze them in freezer bags or keep at room temps for a week.


Split them with a fork for maximum "nooks and crannies" before toasting.


Wednesday, March 2, 2022

Little Delta Bowhunters Sourdough Starter

Bowhunting and sourdough go hand in hand.  I'd like to share a little history I learned from an old post on a popular traditional archery forum on the internet.  

Likely you already know the name Fred Bear, and perhaps you know of his famous trips to hunt in the late 1950's at the Little Delta in Alaska immortalized in Glenn St. Charles novel "Bows on the Little Delta".  Fred made most of his hunts based from a old log trappers cabin owned by Dick McIntire there, and in 1964 Dick Mauch returned there with another group of hunters.  

Supposedly, McIntire had acquired the cabin and the sourdough starter from the old trapper who was running the trap lines on the Little Delta. No one knows how long the trapper had it, or what ingredients he used to start it.   He ran the trap line for many years and guarded his starter keeping it in the top of the flour sack in a ball of dough. Whenever he wanted to bake he would just dump water into the top of the flour sack and mix it in with the sourdough ball...always leaving a portion of the sourdough behind for later use. Once the old timers would get a good starter going, they would guard it carefully to keep it alive and use it indefinitely.  Dick brought this starter back and used it throughout the rest of their lives to make pancakes, waffles, and breads in their home and cabin.  Dick's sourdough bread became sort of famous to his many hosted guests and acquaintances.  

  Here is Fred Bear outside the trappers cabin:

Here Bob Kelly is in the Little Delta kitchen in 1959:


I wonder now if any of that starter survived anywhere amongst the bowhunting community? Though the yeast species change depending on the local environment and populations over time so it may not matter except to those who reminisce about bygone times.  

Starter had much utility to the pioneers and hunters because it was the way they could make bread rise without store bought yeast.  This, along with the bowhunting story above, made it interesting to me and I started a small obsession with all things sourdough.  

Making sourdough starter is easy enough.  All you need is flour, water and time.   When I first started trying to play with sourdough starter I made it from the water of boiled potatoes, but later found this was not needed to make some super active starter. 

Add about 1 cup of four to 1/2 cup of water. Then just cover lightly and let it sit.

This is a great site that describes in detail how to start, feed and maintain your starter.  

When baking frequently I keep my starter at room temperature and feed it a few spoons of flour daily.  When I am away or busy I just place it in the refrigerator and feed it weekly or so.  If I am really going to take a break, I can spread some thinly on a cookie sheet lined with parchment paper and dry it out into chips and keep that in a mason jar.  It is then easy to reconstitute in a day or two if needed by simply adding more flour and water.


The starter can then be used to make everything from pancakes, breads, rolls, English muffins, waffles, pretzels, etc.  


I plan to post some of these above recipes in the future here.


Thursday, January 27, 2022

Wild Goose - Roasting a Whole Bird Without Skin


I am fortunate enough to have a brother who is an avid waterfowler along the Susquehanna river in Maryland.  Not only do I get to hunt with him every now and again, but he sometimes gifts me fowl he has gotten.  Recently my bother gave me a wild goose he shot as a late Christmas present. He skinned the bird and left it whole so cooking and preparation are very important to keep the meat from becoming tough and dry. 

After thawing in the oven for 24 hours.  I brined the bird breast down in a solution of salt, pepper, and brown sugar in a large bowl in the refrigerator for about 5 hours (overnight is best).  


After the brining I rinsed and attempted to get all of the last bits of feather and foreign material from the meat.  Keep as much fat on there as you can.  

I diced my stuffing consisting of apples, celery, onion, carrots and an orange (any citrus will do).  


Pat the bird dry and coat the cavity with salt and pepper.  I then prefer to use an large oven bag to maximize the moistness since there is no skin.  Anything you can do to keep the bird from drying out is best, so I use an oven bag inside of a covered roasting pan.  Place the bird in the bag after trussing and try not to let any sharp leg or wing bones from puncturing the bag.  


Then stuff the cavity with as much of the diced veggies as possible, placing the remaining around the outside of the bird.  Sprinkle additional salt and pepper on the outside of the breast and body.  Here I added 1 cup of Port wine.  My preference is plum wine but my local outlet was out of that so I went with Port this time. Next, add 2 cups of chicken broth or stock and close the bag using the bag tie that comes with the oven bags,  Leave it on the outermost closure possible and use your finger to leave a vent hole on top of the bag.


Place the cover on and put it in the over on 350 F for 2 hours. 


Typically with about 30 minutes left I will remove the lid of the roasting pan to brown the bird a bit more before it is done.  Monitor the internal temperature at the thickest part of the breast and at 160 degrees and remove the bird to rest and continue cooking.  Do not overcook the bird or it will be tougher.  


While the bird is resting, drain the bag juices into a separator.  There will not be much fat to discard but goose fat now is not wanted!


While that separates, in another pan melt butter at medium heat and add about 2 tablespoons of flour to make a slurry.  When it is slightly browning add the separated layer of juices while you stir.  Raise heat to medium high and boil while stirring until the gravy thickens. 


Slice the goose thinly and serve with the gravy over rice or masked potatoes!


Growing up this is a meal reserved for Christmas or New years dinner!  Yummy! 


The goose gravy is about the finest gravy in my opinion. 


Tuesday, January 11, 2022

Shredded Venison Cornbread Casserole Recipe

 I started this recipe from shredded neck meat that I describe cooking here:


This dish is very reminiscent of pot pie, but with a cornbread and beefy flavor.  One of my household favorites and if you wanted to dirty another pan it can be made with a cornbread bottom crust as well.


Ingredients:

1/2 chopped sweet onion

2  sticks chopped celery

1 cup sweet corn

1 cup peas

1 cup carrots chopped

2 cups of venison bone broth (or beef broth)

1/4 cup butter or bacon grease

3 tablespoons all purpose flour

2 boxes of Jiffy cornbread (or homemade)

2 eggs and 2/3 cup milk (for cornbread mix)


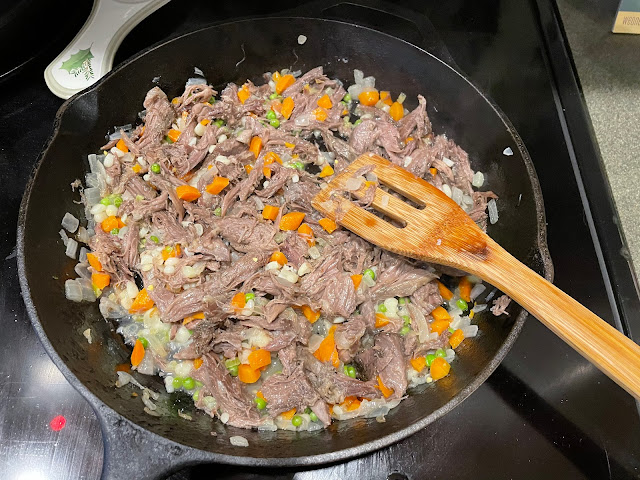
Start by adding chopped onion and celery to a cast iron skillet on medium low heat to saute for about 10 minutes until soft. 


  Add about 4 cups of shredded venison meat and simmer for a few minutes until heated. Then add the veggies - the sweet corn, peas, and carrots and continue to simmer for another 3-5 minutes.


Next add 3 or 4 tablespoons of butter until well melted and slowly mix in 3 tablespoons of all purpose flour until everything is coated and results in a lightly brown slurry.  


Add 2 cups of venison bone broth, increase the heat to medium high and simmer while stirring frequently until the gravy thickens.  

Follow the instructions for the cornbread mix and spread the uncooked batter over the entire skillet.


Place the entire skillet uncovered into a preheated oven at 400 degrees for 15-20 minutes according to the corn mix instructions.


Cut and serve.