Search This Blog

Thursday, January 27, 2022

Wild Goose - Roasting a Whole Bird Without Skin


I am fortunate enough to have a brother who is an avid waterfowler along the Susquehanna river in Maryland.  Not only do I get to hunt with him every now and again, but he sometimes gifts me fowl he has gotten.  Recently my bother gave me a wild goose he shot as a late Christmas present. He skinned the bird and left it whole so cooking and preparation are very important to keep the meat from becoming tough and dry. 

After thawing in the oven for 24 hours.  I brined the bird breast down in a solution of salt, pepper, and brown sugar in a large bowl in the refrigerator for about 5 hours (overnight is best).  


After the brining I rinsed and attempted to get all of the last bits of feather and foreign material from the meat.  Keep as much fat on there as you can.  

I diced my stuffing consisting of apples, celery, onion, carrots and an orange (any citrus will do).  


Pat the bird dry and coat the cavity with salt and pepper.  I then prefer to use an large oven bag to maximize the moistness since there is no skin.  Anything you can do to keep the bird from drying out is best, so I use an oven bag inside of a covered roasting pan.  Place the bird in the bag after trussing and try not to let any sharp leg or wing bones from puncturing the bag.  


Then stuff the cavity with as much of the diced veggies as possible, placing the remaining around the outside of the bird.  Sprinkle additional salt and pepper on the outside of the breast and body.  Here I added 1 cup of Port wine.  My preference is plum wine but my local outlet was out of that so I went with Port this time. Next, add 2 cups of chicken broth or stock and close the bag using the bag tie that comes with the oven bags,  Leave it on the outermost closure possible and use your finger to leave a vent hole on top of the bag.


Place the cover on and put it in the over on 350 F for 2 hours. 


Typically with about 30 minutes left I will remove the lid of the roasting pan to brown the bird a bit more before it is done.  Monitor the internal temperature at the thickest part of the breast and at 160 degrees and remove the bird to rest and continue cooking.  Do not overcook the bird or it will be tougher.  


While the bird is resting, drain the bag juices into a separator.  There will not be much fat to discard but goose fat now is not wanted!


While that separates, in another pan melt butter at medium heat and add about 2 tablespoons of flour to make a slurry.  When it is slightly browning add the separated layer of juices while you stir.  Raise heat to medium high and boil while stirring until the gravy thickens. 


Slice the goose thinly and serve with the gravy over rice or masked potatoes!


Growing up this is a meal reserved for Christmas or New years dinner!  Yummy! 


The goose gravy is about the finest gravy in my opinion. 


Tuesday, January 11, 2022

Shredded Venison Cornbread Casserole Recipe

 I started this recipe from shredded neck meat that I describe cooking here:


This dish is very reminiscent of pot pie, but with a cornbread and beefy flavor.  One of my household favorites and if you wanted to dirty another pan it can be made with a cornbread bottom crust as well.


Ingredients:

1/2 chopped sweet onion

2  sticks chopped celery

1 cup sweet corn

1 cup peas

1 cup carrots chopped

2 cups of venison bone broth (or beef broth)

1/4 cup butter or bacon grease

3 tablespoons all purpose flour

2 boxes of Jiffy cornbread (or homemade)

2 eggs and 2/3 cup milk (for cornbread mix)


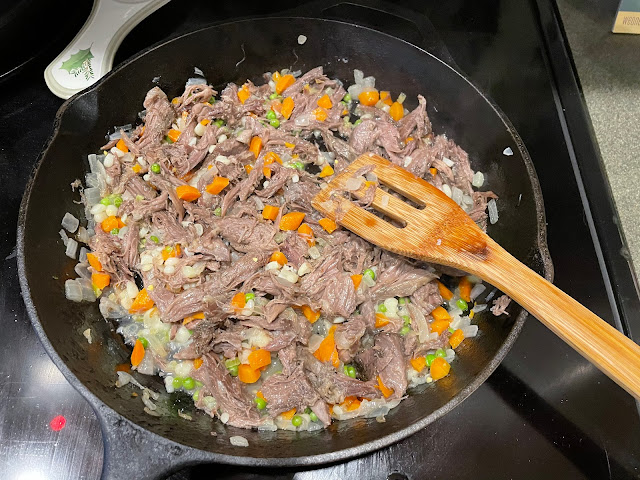
Start by adding chopped onion and celery to a cast iron skillet on medium low heat to saute for about 10 minutes until soft. 


  Add about 4 cups of shredded venison meat and simmer for a few minutes until heated. Then add the veggies - the sweet corn, peas, and carrots and continue to simmer for another 3-5 minutes.


Next add 3 or 4 tablespoons of butter until well melted and slowly mix in 3 tablespoons of all purpose flour until everything is coated and results in a lightly brown slurry.  


Add 2 cups of venison bone broth, increase the heat to medium high and simmer while stirring frequently until the gravy thickens.  

Follow the instructions for the cornbread mix and spread the uncooked batter over the entire skillet.


Place the entire skillet uncovered into a preheated oven at 400 degrees for 15-20 minutes according to the corn mix instructions.


Cut and serve.


Thursday, December 30, 2021

Venison Neck Roast Recipe

If you butcher your own deer like I do, consider this method for dealing with the neck.  Most commercial butchers will simply cut away enough meat from the neck and throw it into the burger pile.  This results in a fair amount of waste and you lose some very long fiber muscle meat that is excellent for "pulled" types of recipes.  

Today I decided to try a cornbread casserole for dinner, so that was a good excuse to grab a frozen neck and make some room in the freezer.  To see that recipe check it out here:

When I harvest a deer, after skinning, I will cut off the head and then remove the neck from the body with a meat saw or cordless sawzall.  Then I will simply vacuum seal the whole roast into a bag after I remove the windpipe.  If you only have a narrow slow cooker like I have (I've been looking for a larger one) you either need to cut the roast in half again before or after freezing.  Some folks stress about chronic wasting disease and cutting the spine and cord, but my thoughts are that if there was a huge risk there it would be known.  To date, there have been no reported cases of CWD infection in people.  I try to be careful not reusing the knives and saw on other meat until they are cleaned well though.  This time I destroyed some neck meat during the "acquisition phase" of the meat which resulted in a smaller roast that fit perfectly. 


Ingredients:

4 cups of chicken broth

2 celery sticks

1/2 small onion chopped

1/2 teaspoon salt

1/2 teaspoon black pepper


The beauty of the slow cooker here is you do not need to plan ahead and thaw the roast.  I just placed the frozen roast on top of some frozen celery, some coarsely chopped onion, added 4 cups of chicken broth along with salt and pepper.  Then you can forget about it for 5 or 6 hours while it cooks. 

Normally I would use some of my canned bone broth for extra flavor, but here I am simply cooking the meat for additional recipes, so I will save my bone broth for those if needed.  


After the cooking time and the meat is fall off the bone, remove the roast to cool.


Take two forks and shred the meat when it has cooled enough to handle, but not cold or it will not pull apart as easily.


Strain and filter that broth for later use.  I used a funnel and a paper towel to filter and poured it into a mason jar to store in the refrigerator until needed.


Now you have some nice long fiber pulled venison.  This is delicious as is in a sandwich, with  BBQ sauce, in tacos, or used in other savory recipes such as shredded cornbread casserole I will post up in the future.


Tuesday, December 7, 2021

Canning Wild Pheasant Legs - Canned Pheasant in Wine Recipe

 Recently a friend of mine invited me on a pheasant hunting trip.  I decided I would use my great grandfather's LC Smith 16 gauge No. 2 grade double barrel shotgun.  The trip was a great success and I bagged 3 birds with the 118 year old shotgun.  I've now successfully hunted birds with my father's, grandfather's, and great grandfather's double guns, but that is a whole other story. 


I decided to can some of these birds, especially the tough legs.  I've previously just used the crock pot to slow cook them, but I have been doing a fair bit of canning wild game recently with great success so I figured I would try.  I found scant few resources and recipes online, but I figured it should not be that different from other game meat canning. 

I was careful to try to remove all lead shot and feathers from the meat.  I decided with a raw pack method and warmed the meat in hot water before placing the legs directly into the hot jars along with 1/2 teaspoon salt in each pint jar.  I added a little hot water to each jar due to the airspace the legs left and the lean nature of the meat, though I found out afterward it was unnecessary.  

I used a wide mouth mason for a little extra room for adding the legs.

I also cubed up the breast meat and added those similarly to small mouthed pint jars.


I did not add any water to the breast pieces as they should cook down and provide enough liquid via this method.  I placed the banded jars into the pressure cooker as I went.  I sealed the canner lid and after letting the headspace vent for 10 minutes, placed my weight and canned the meat at 15 pounds pressure for 75 minutes.  


After the canner cooled I removed the jars and placed them on a wire rack to cool.

Not wanting to waste the breast bones and little bits of meat left after I filleted the breasts, I put them into a stock pot and covered them with water.  I added some diced onion, carrots, salt and pepper, and simmered the pheasant stock in a covered pot for several hours.

Once finished I poured the stock into quart mason jars and let cool.  This will go to the refrigerator to add to future dishes I planned to make, or anything else that could use a little stock flavor.  

Here are all the products from the pheasants cooling, stock, legs, and breast. If I had more stock I could also have pressure canned that, but it will not last long so once cooled I just refrigerated.


My favorite Pheasant Recipe using the meat and stock produced above.


 Pheasant in Wine:

 Canned pheasant pieces

1 carrot

1 onion

1/2 celery Stalk

3 cups pheasant stock (or chicken)

1 cup white wine

4 tbsp. butter or bacon fat

3 tsp. basil

1 1/2 tsp. cornstarch

1 cup uncooked Jasmine rice 

Salt and Pepper to taste


First drain the canned pheasant meat (save the liquid for the stock addition). Remove the bones and hard cartilage from the legs. Set the meat aside. Here you can see I used both dark leg meat and a jar of white breast meat I had canned.


Dice the carrot, onion, and celery stick finely.  Saute this in the pan with the butter or bacon fat at medium heat for about 10 minutes stirring often until the onions are tender and translucent.   


Place the canned pheasant into the pan and add the wine.  After a few minutes of stirring add the pheasant stock and basil and simmer covered for about 5 minutes. 


Cook the rice in 2 cups of additional chicken/pheasant stock in a small separate pan.  I like to boil the 2 cups of stock and them add the rice and cover.  Turn off the burner and stir once or twice until all the liquid is absorbed and the rice is done.


Remove the lid to the pheasant pan and add the cornstarch and continue to simmer for a few minutes to thicken the liquid.  Add salt and pepper to taste.  Once the rice is done, spoon meat and gravy mixture over the rice and serve.


This was a hit with my family, so I will continue to can future pheasant, especially the legs.


Tuesday, November 9, 2021

Wild Maryland Cookbook - Maryland Recipies by Maryland Residents

Maryland Dept of Natural Resources Cookbook

I am excited to share the news that the MD DNR finally released this cookbook located Here.  I submitted 3 recipes hoping one would make it in the publication.  Well, it turns out they accepted and included all three!  The cookbook contains over 60 recipes from foraging to deer and fishing quarry.   The menu of recipes can be found here at the View all Recipes Link.

I am honored to have included some of the recipes located on this very Blog!


Saturday, November 6, 2021

A Toast to Wild Persimmons - Winemaking Recipe

Originally published in Traditional Bowhunter Magazine Dec/Jan 2022 issue.


 I eased from the dark woods though the post-dawn mist into the light of an old overgrown field. I moved with the cautious speed of a cold snail while scanning for the slightest movement.  My eyes zipped to a brown and white flick as a doe's rump moved behind a wrist thick tree trunk.  Despite the deer standing only 25 yards distant, another such tree was positioned, of course, right through the kill zone.  I stood quivering with a mounting excitement as the old doe looked up in frozen rigidity.  Did she see me, or was she just looking about as deer do?  Heart thumping in my throat now, she lowers her head and begins again to feed among the tall grasses taking that next step clear of the tree.  Instinctively feeling this was the right time, I raised my bow while drawing and settled into anchor.  Staring at a hair out of place above her front leg, my arrow was gone without thought.  The orange fletching zipped through the spot I was looking at.  She exploded crashing through the brambles and shrubs leaving me breathing hard while slightly shaken, exhilarated, and elated.  I love that feeling!

The old field had not been mowed for a decade on the old farm property.  That doe was intent on eating the sweet persimmon fruit that littered the ground.  Trees were starting to take over from the thick rose, thistle, and primary colonizers to woody trees.  Several large old persimmon trees were located along the old field edge and animals had helped to disperse the seeds. These trees now 15-20 feet tall, along with a few honey locust and poplar, grew plentiful in the old field.  The majority of these trees provided shade and cover, but very few actually produced fruit.

There are several varieties of persimmon trees, though the kind that grow wild in the Eastern Appalachian area where I live are the Diospyros virginiana or American Persimmon.   Several varieties of Asian persimmons are available in markets. Other transplants grow wild including the Japanese Hachiya variety that are common in California, and the black variety native to Mexico that can be found in the American southwest.  

The American are "astringent" type, meaning if you bite into a unripe fruit it is so bitter you may lose your sense of taste altogether for 20 minutes.  You would swear it would never be something fit for consumption due to amount of tannin.  Once the fruit ripens and softens however, it becomes quite sweet with a cinnamon overtone.  

Important to the hunter, the fruit is eaten by many animals including whitetail deer and wild hogs.  They are a favorite of coyotes, opossums, and raccoons.  The fruit is high in vitamin C and is traditionally made into breads, puddings, and alcoholic beverages by our pioneer ancestors.  


Each Autumn, my son and I, head into the brush with buckets to collect the fruit.  The ripe fruit is soft to the touch with skin that is slightly opaque to the eye.  They fall from the branches easily if you shake the branch or tree.  The green fruits are difficult to remove and sometimes break off a piece of the stem.  We keep ripe and green separated into their own buckets.  The ripe fruits can be eaten, though care must be taken to not swallow the hard seeds which will cause illness if ingested.  


We process the fresh ripe fruit right away by using a potato masher to squash 6-8 fruits at a time in a fine mesh metal strainer.  The pulp eventually squeezes through into a bowl, leaving the bitter skin and hard seeds behind.  Most recipes call for 2 cups, so I place the pulp into quart sized freezer bags in 2 cup batches.  The bags will freeze flat and take up little space in your freezer until ready.


The unripe fruit must be ripened by placing them into a paper grocery bag with an apple or banana and rolled closed to sit for up to a week.  I check them every few days and process the ripe ones. The ethylene gas from the grocery store fruit will help the fruit ripen quickly.  Old lore says that a frost is needed to ripen the fruit, but I have found that putting them into the freezer or refrigerator for any time period will not speed up the ripening.  


Breads, puddings, and jams are tasty, but my main use for the persimmon is making wine!  My son's Taekwondo instructor informed me Persimmon wine is very popular in Korea, so I gave it a try.  Now, I cannot see wasting them on jams and breads.

Wine making at home is not that difficult and requires little investment in equipment.  I started by using wide mouth quart mason jars I already owned for canning food and do small batches at a time.  I found a company that sells stainless steel wide mouth lids and water airlocks for fermenting other foods, but you could use your old glass gallon cider jugs with a balloon and needle hole on the end also.  I will describe the recipe I used for quart sized jars.


Ingredients:

3/4 cup persimmon pulp

2 cups sugar

2 teaspoons lemon juice

1/2 packet of wine making yeast

1 cut up raisin

1 tablespoon of pectin enzyme

Add the room temperature pulp and sugar to the jar. Then add the tea, lemon juice (for acid), pectin enzyme (to clarify), and a chopped raisin for some extra yeast nutrients to help things grow.  

Meanwhile add the 1/2 a packet of wine yeast to a small cup and hydrated with water to activate it for 15 minutes or so, swirling every few minutes.

Then, add the yeast and stir before filling the jar to within a few inches of the top with tap water to allow some expansion of material during fermentation.

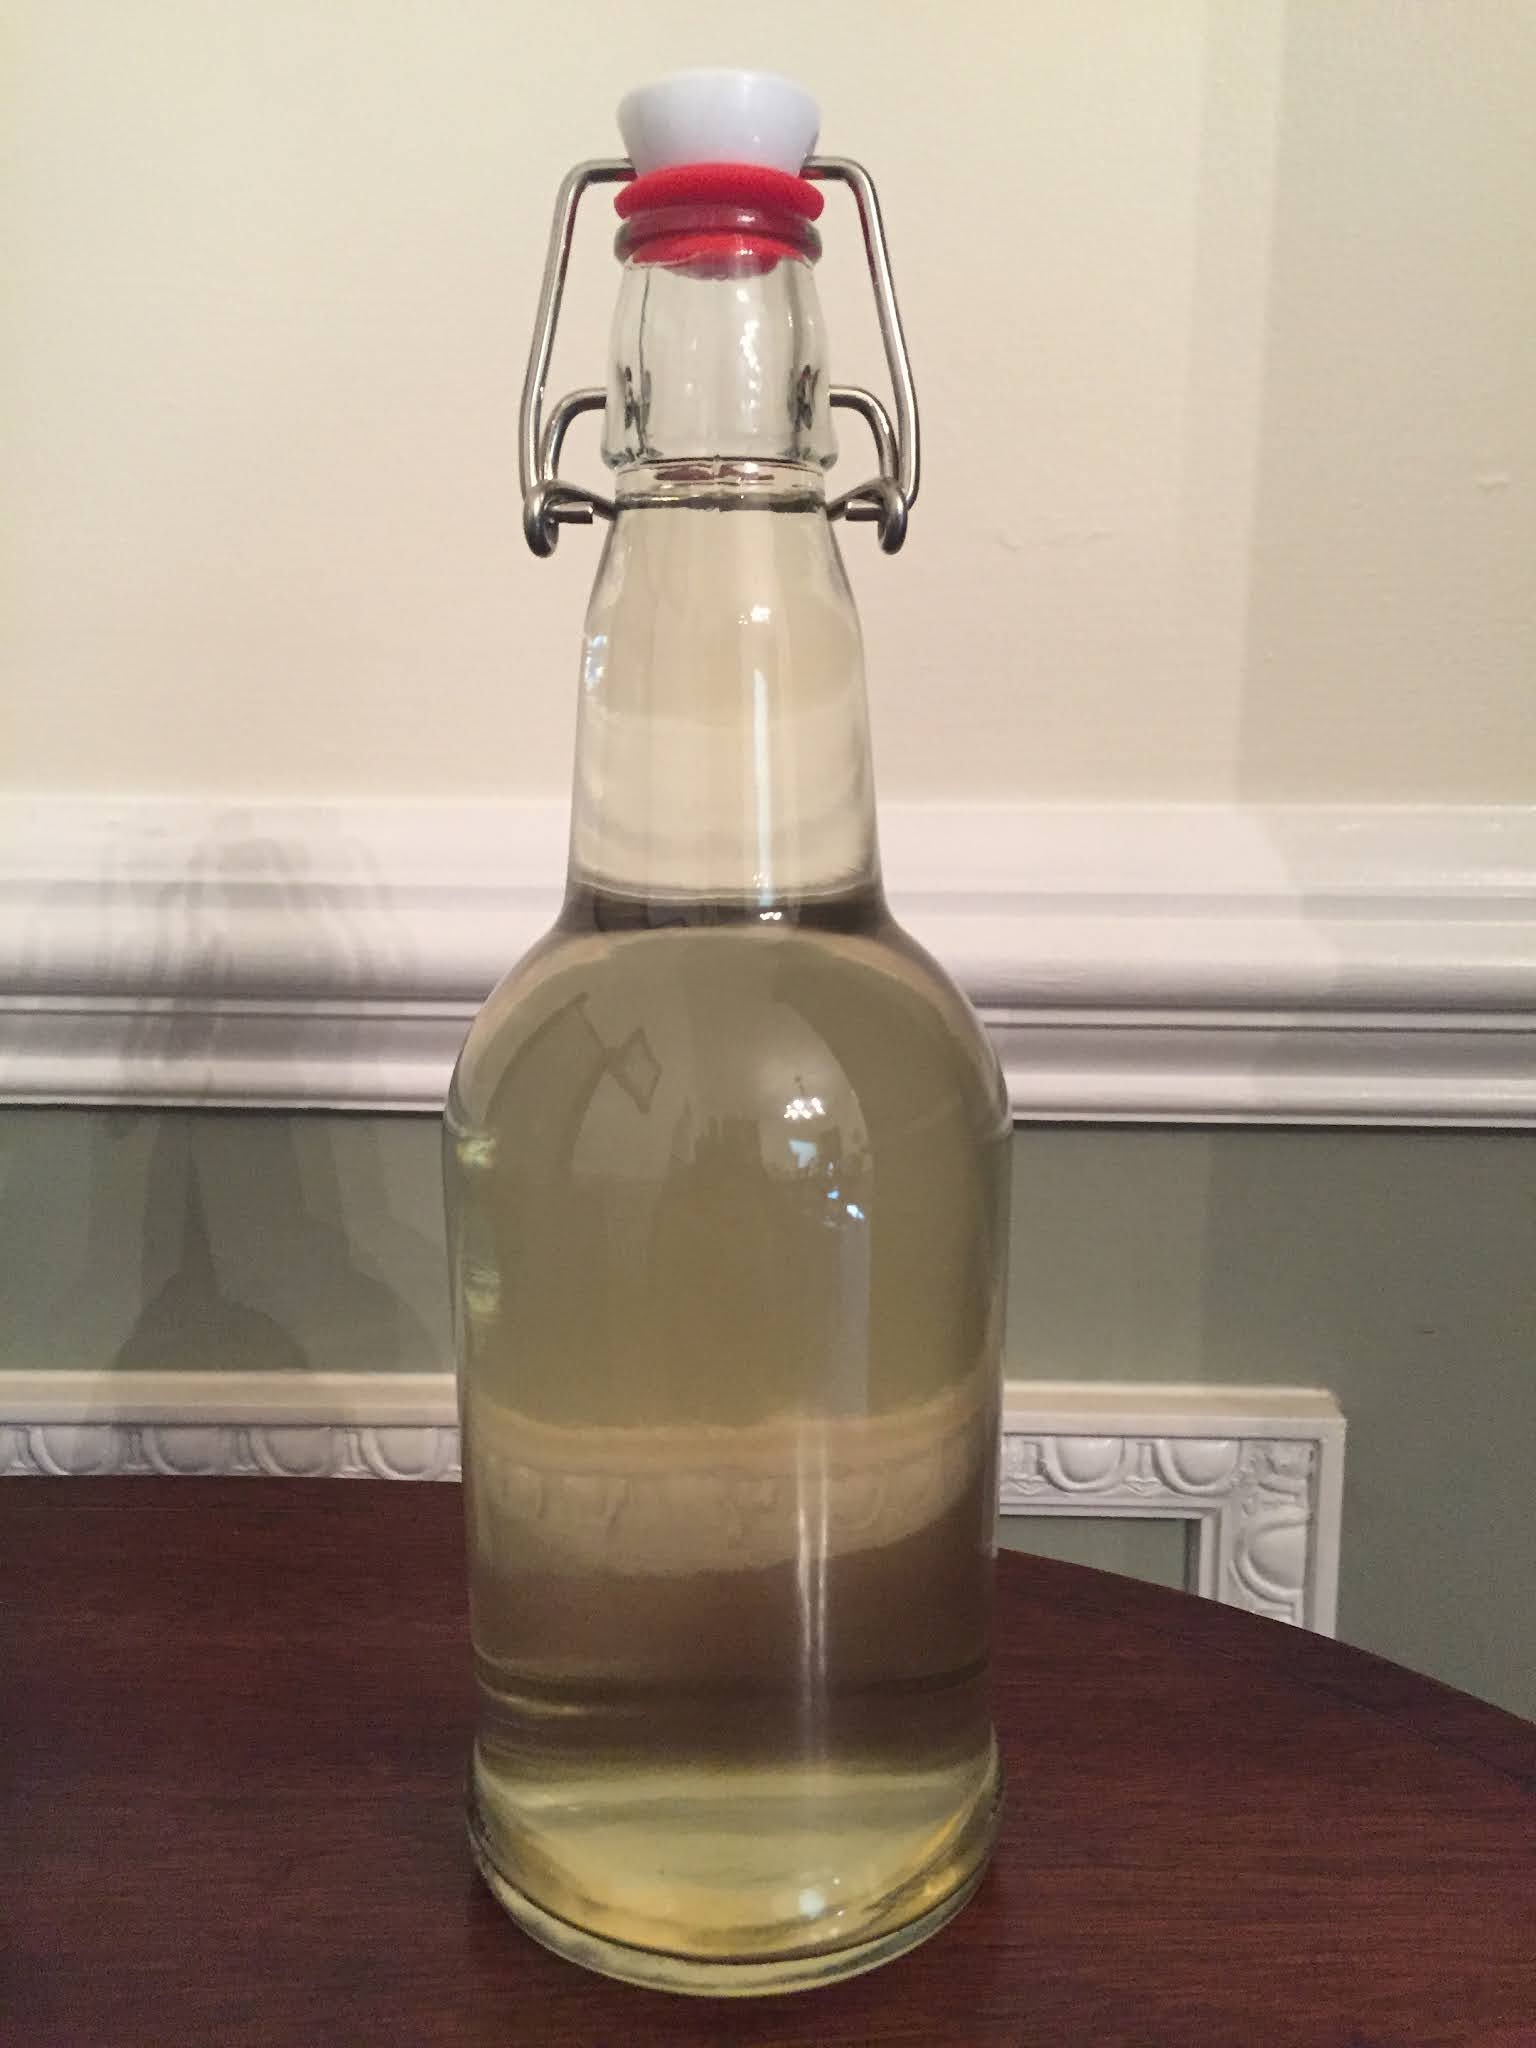
Close the lid, fill the airlock, and date the jars before moving them to a storage area about 70-76 degrees (my den bookshelf works). In about 5 weeks it is time to filter out the wine if they stopped bubbling and fermenting.  I use a strainer lined with cheese cloth and re-bottled the liquid in other mason jar additional aging. After a month or two more of aging, I rack the wine into a flip top bottle (or you could just use another mason jar).  For this I use a small section of aquarium tubing to siphon off the liquid, being careful to leave the sediment behind.  The bottles should mellow for about another month before consuming. I can say it pairs very well with roast venison.  Cheers to the persimmon, that provides a natural food source to attract game as well as a fall harvest and a delicious wine!

You can also do larger batches in gallon jugs!


Wednesday, March 17, 2021

Shad Roe Recipe - A Spring Tradition

There is a traditional American spring food that goes back to our founding that has largely been forgotten to most these days.  The early Colonists learned fast from the Native Americans and relied heavily on the spring shad runs for sustenance. In the spring of 1778, the spring shad run virtually saved the Continental Army after the long winter at Valley Forge, PA. 

The shad fish itself is a bony, oily, and fishy tasting critter and this has tarnished it's ranking in modern cuisine. However the roe (egg sack) does not share in those qualities and is in fact delicious table fare. 

My father would hunt a restaurant that served the delicacy every spring and the thought would repulse us kids. Then as we all got older, my father had to travel from Northern Delaware to Thurmont, Maryland to a small Irish Restaurant called "The Shamrock".  I finally tried the tasty fried row wrapped in bacon and was delighted to find it had a pleasant consistency, delicate taste, with no fishiness at all.  Every Spring my father would travel to see me in MD and we would stop at the Shamrock for the shad roe.  

After my Father passed away, and the Shamrock closed it's doors, I was left without my traditional spring meal.  

One day while passing the old restaurant I was discussing shad with my good friend Bill.  Several days later he texted me a photo saying the local Wegman's had shad roe.  I decided to cook it myself!


Ingredients:

Milk or cream
bacon grease
minced garlic
Parsley
salt and pepper
(the Bailey's is for the cook)


Soak the egg sack in milk, heavy cream or buttermilk (I used a milk and cream mixture until room temperature).

Heat up your cast iron medium low heat with about 3 tablespoons of bacon grease or cook bacon in the pan before adding the fish.

Add the garlic and stir for a few minutes before adding the whole roe being careful not to puncture the sack.


Sprinkle with salt, pepper, and parsley and fry for about 5 minutes per side, turning once.


Enjoy with your favorite Irish drink.  


The consistency is more like a delicate meat with a subtle smokey flavor.  Not fishy at all. Happy St. Patrick's Day all.